This section covers the functions available in manual mode from the app.
Move
This section describes how to move Tipron to any location via manual operation.
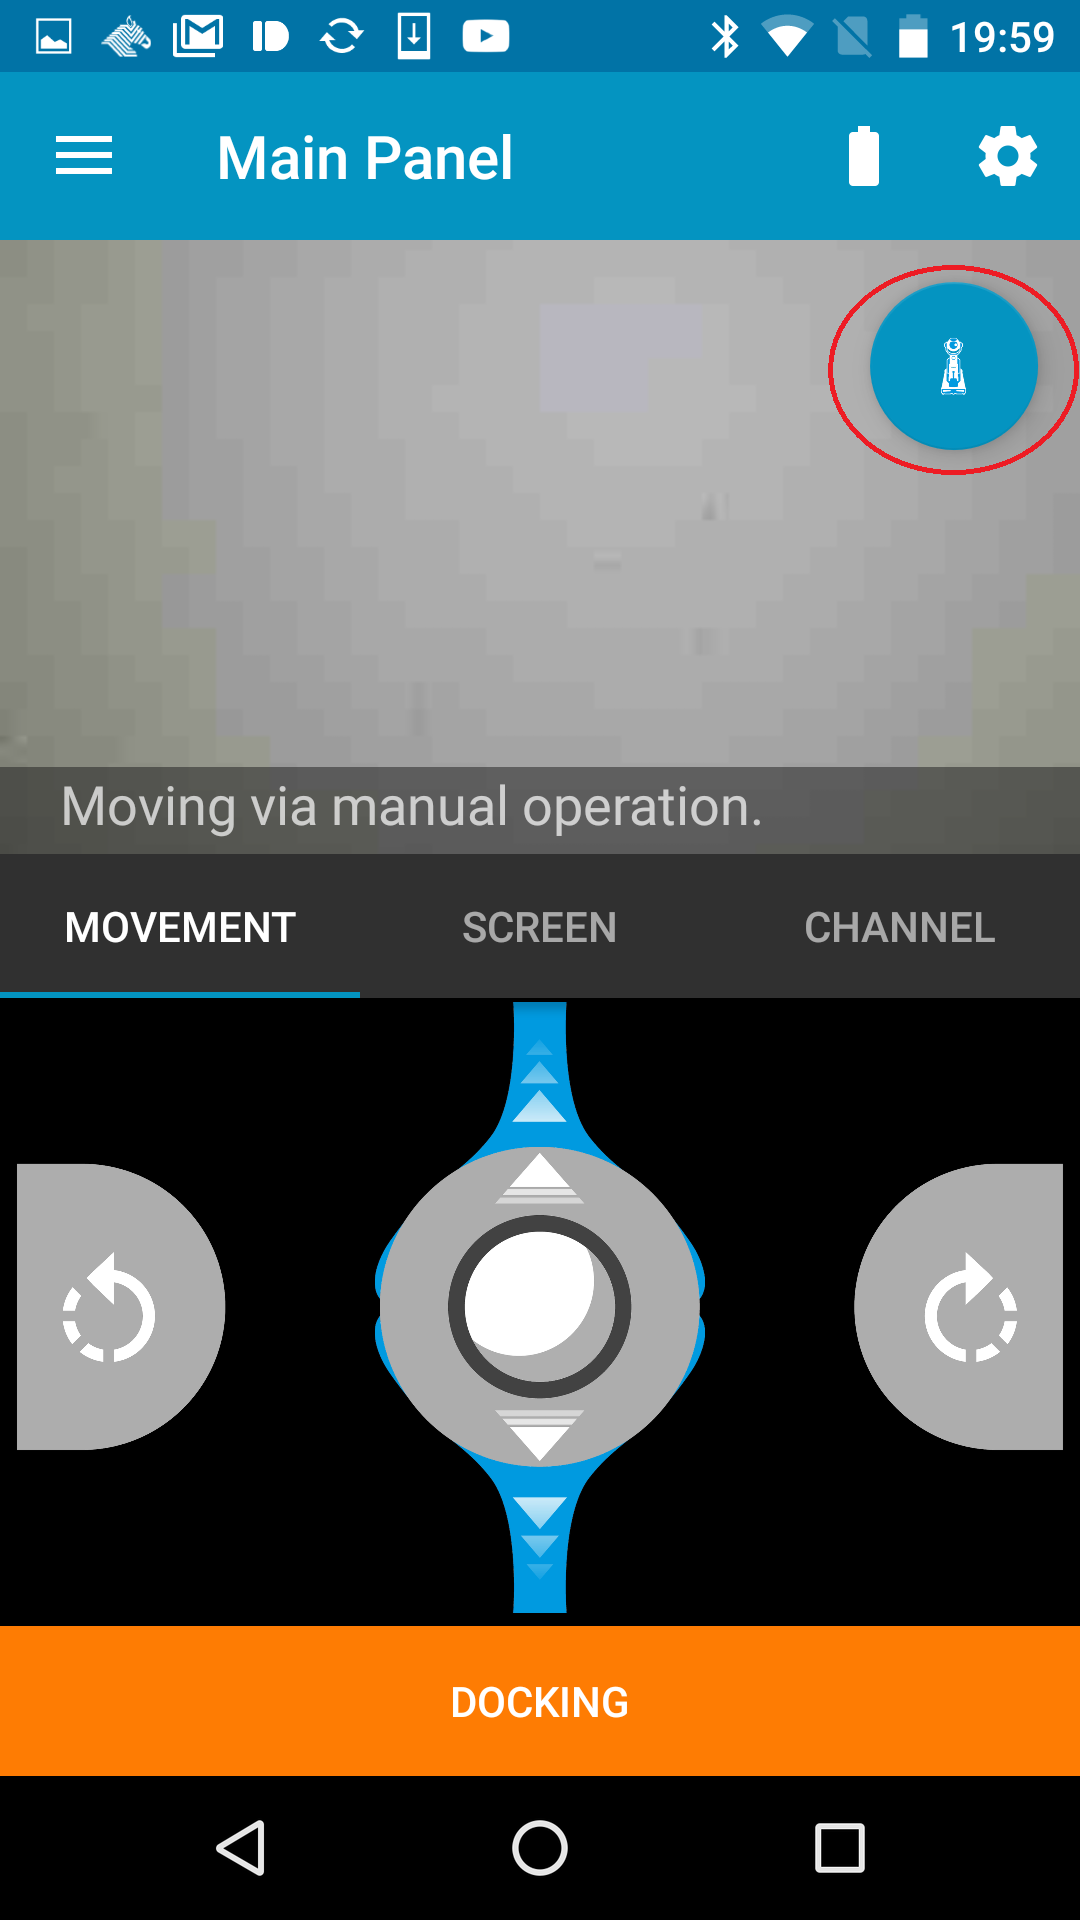
- Tap the manual operation icon from the main panel.
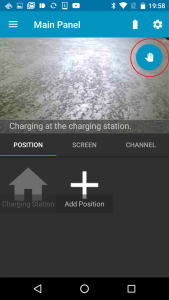
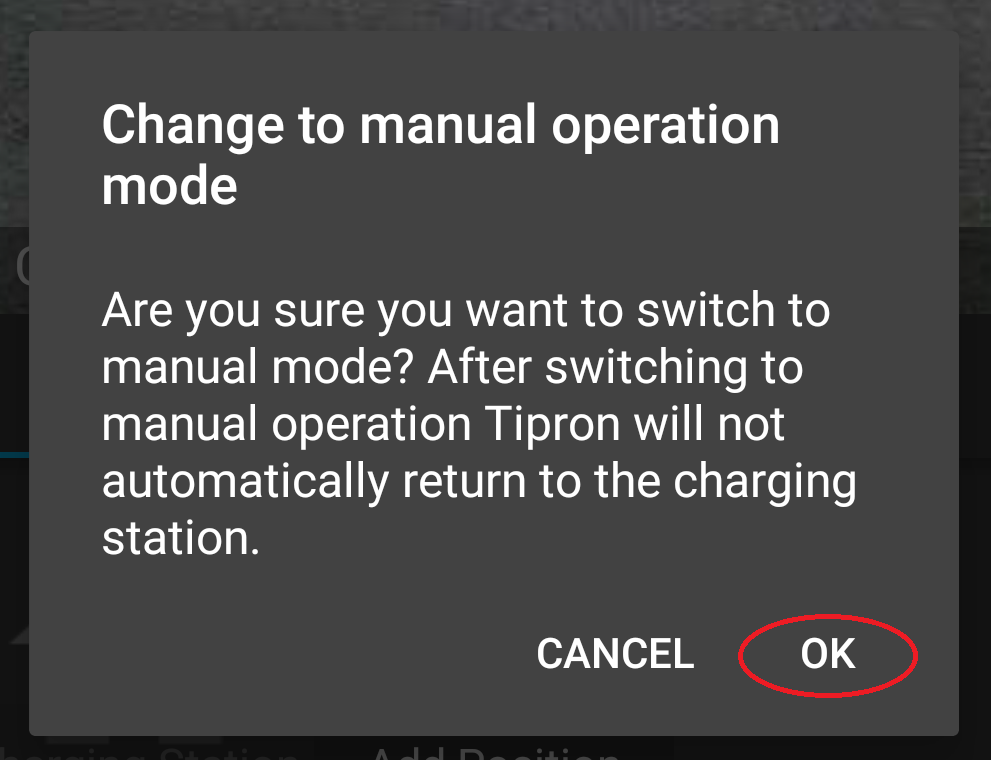
- Confirm the message “Change to manual operation mode” and tap “OK”. Tipron will automatically move forward from the charging station.

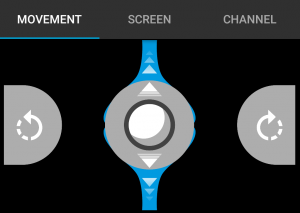
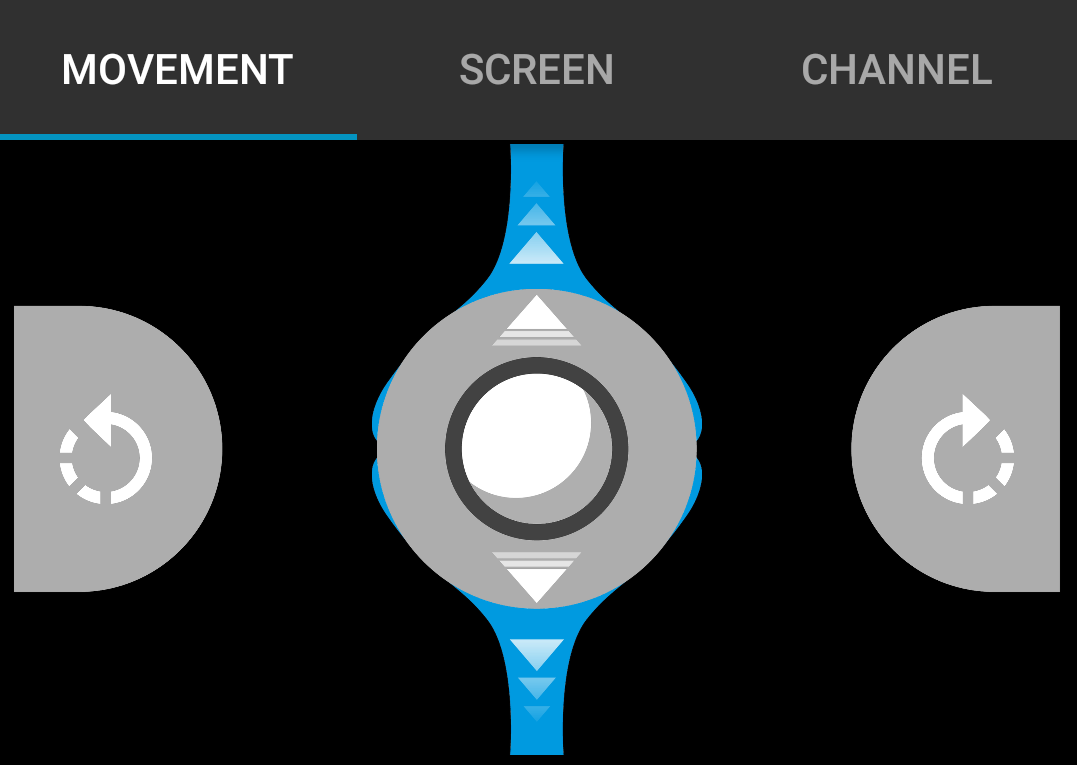
- On the top of the screen, a live camera stream is displayed. Use the UI at the bottom of the screen while viewing the video to move Tipron.
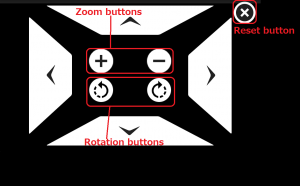
Slide the circle in the center of the screen. Slide up to go forward and slide down to go backwards.
Long press the left circle to rotate left. Long press the right circle to rotate right.
Transformation to projection mode
After moving to the desired position, press the transform button to start projection mode.When transformation is complete, projection will start automatically.
To return to move mode, tap the same transform button again.
Screen adjustment
After transforming to projection mode, projection direction, angle and size can be adjusted.
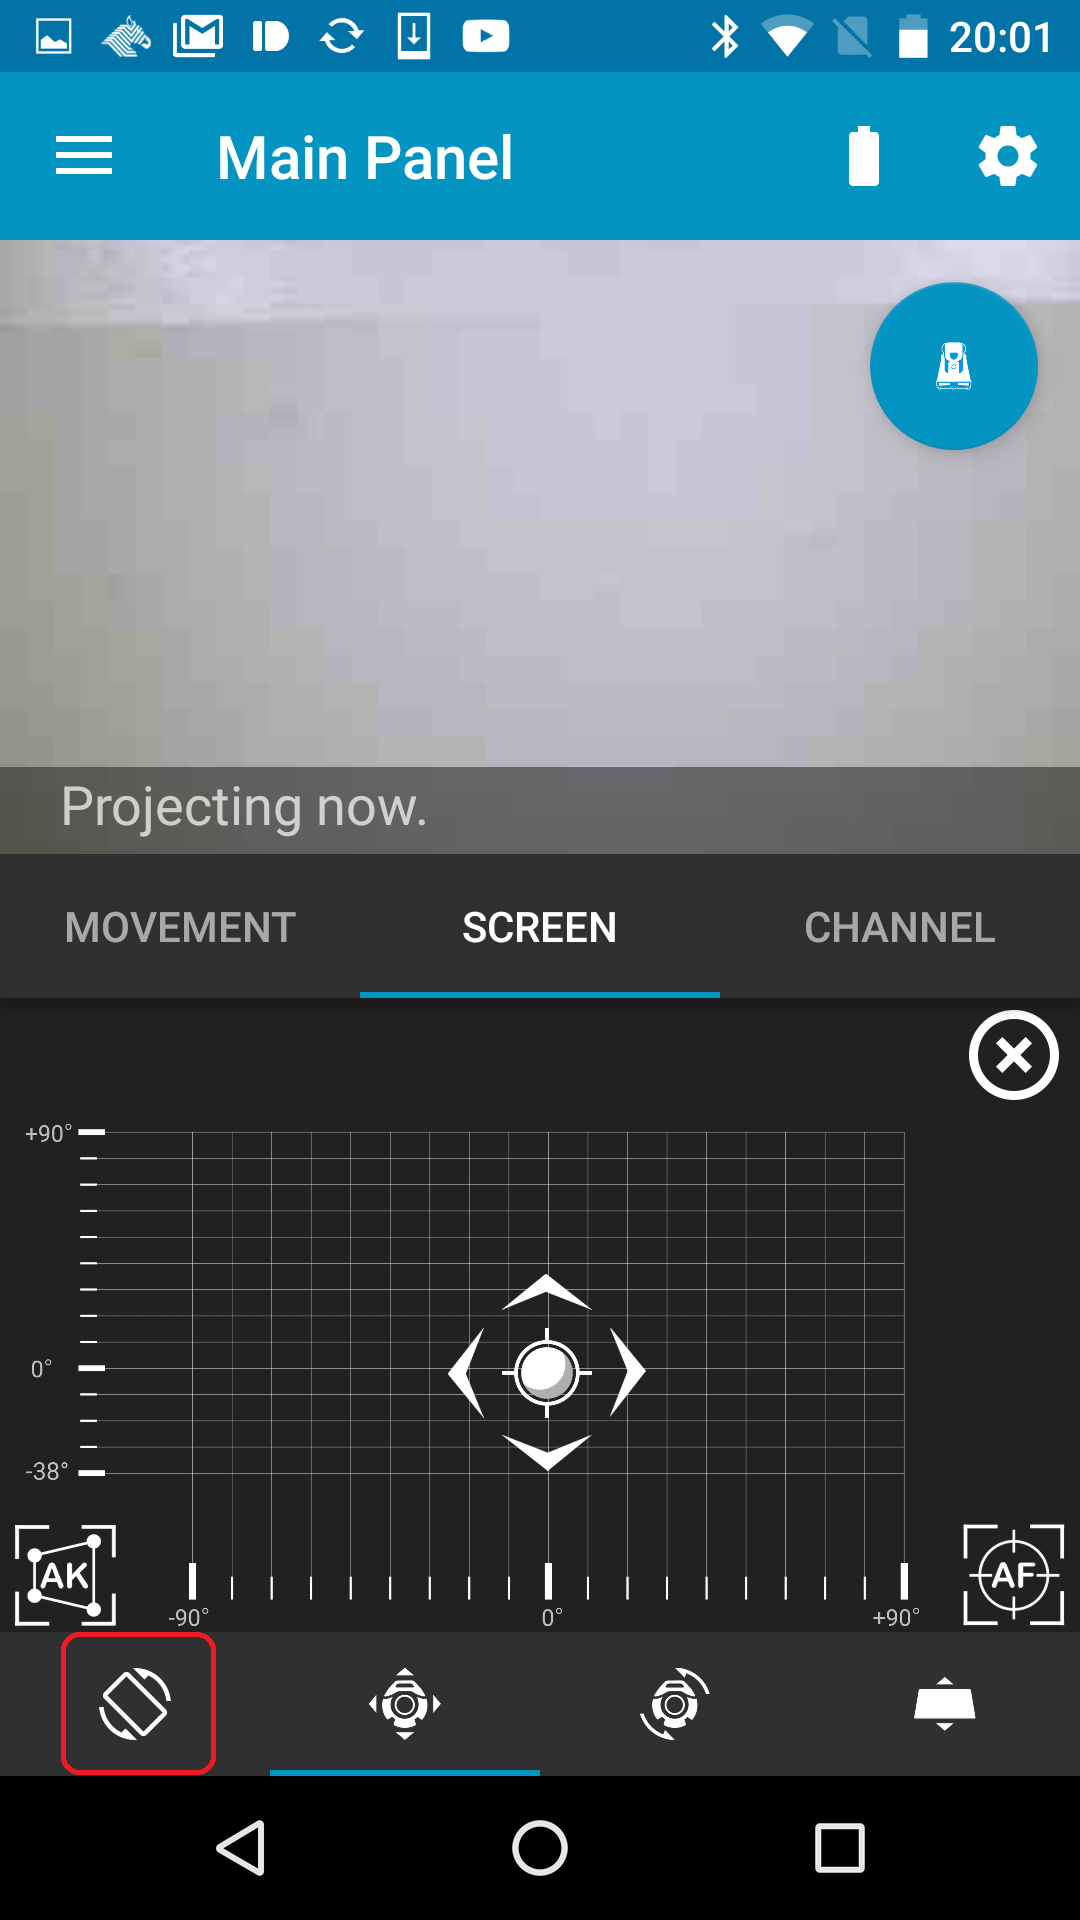
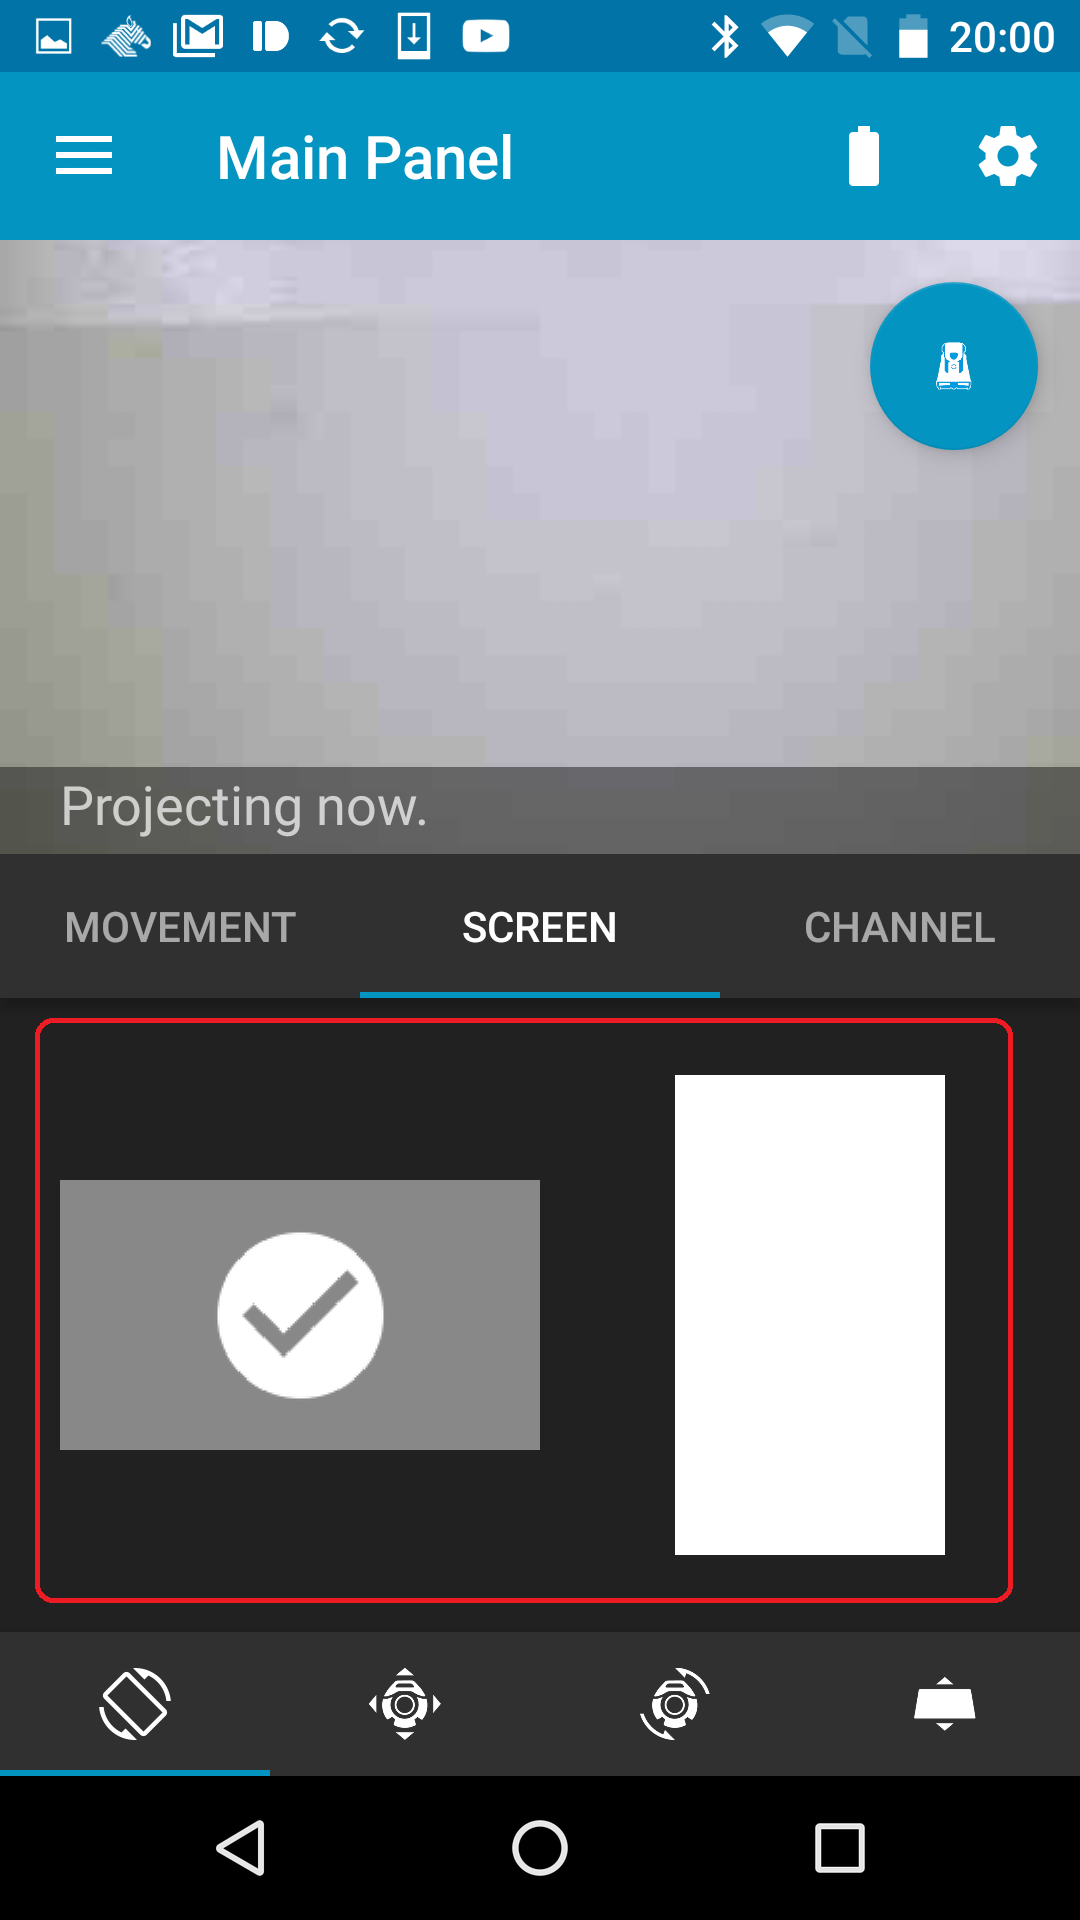
Vertical & Horizontal
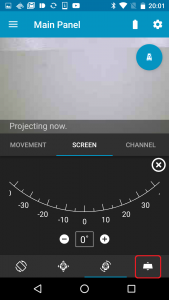
- Tap the “SCREEN” tab on the main panel.
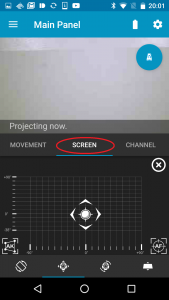
- Select Vertical & Horizontal tab in the screen tab.
- Choose vertical or horizontal.

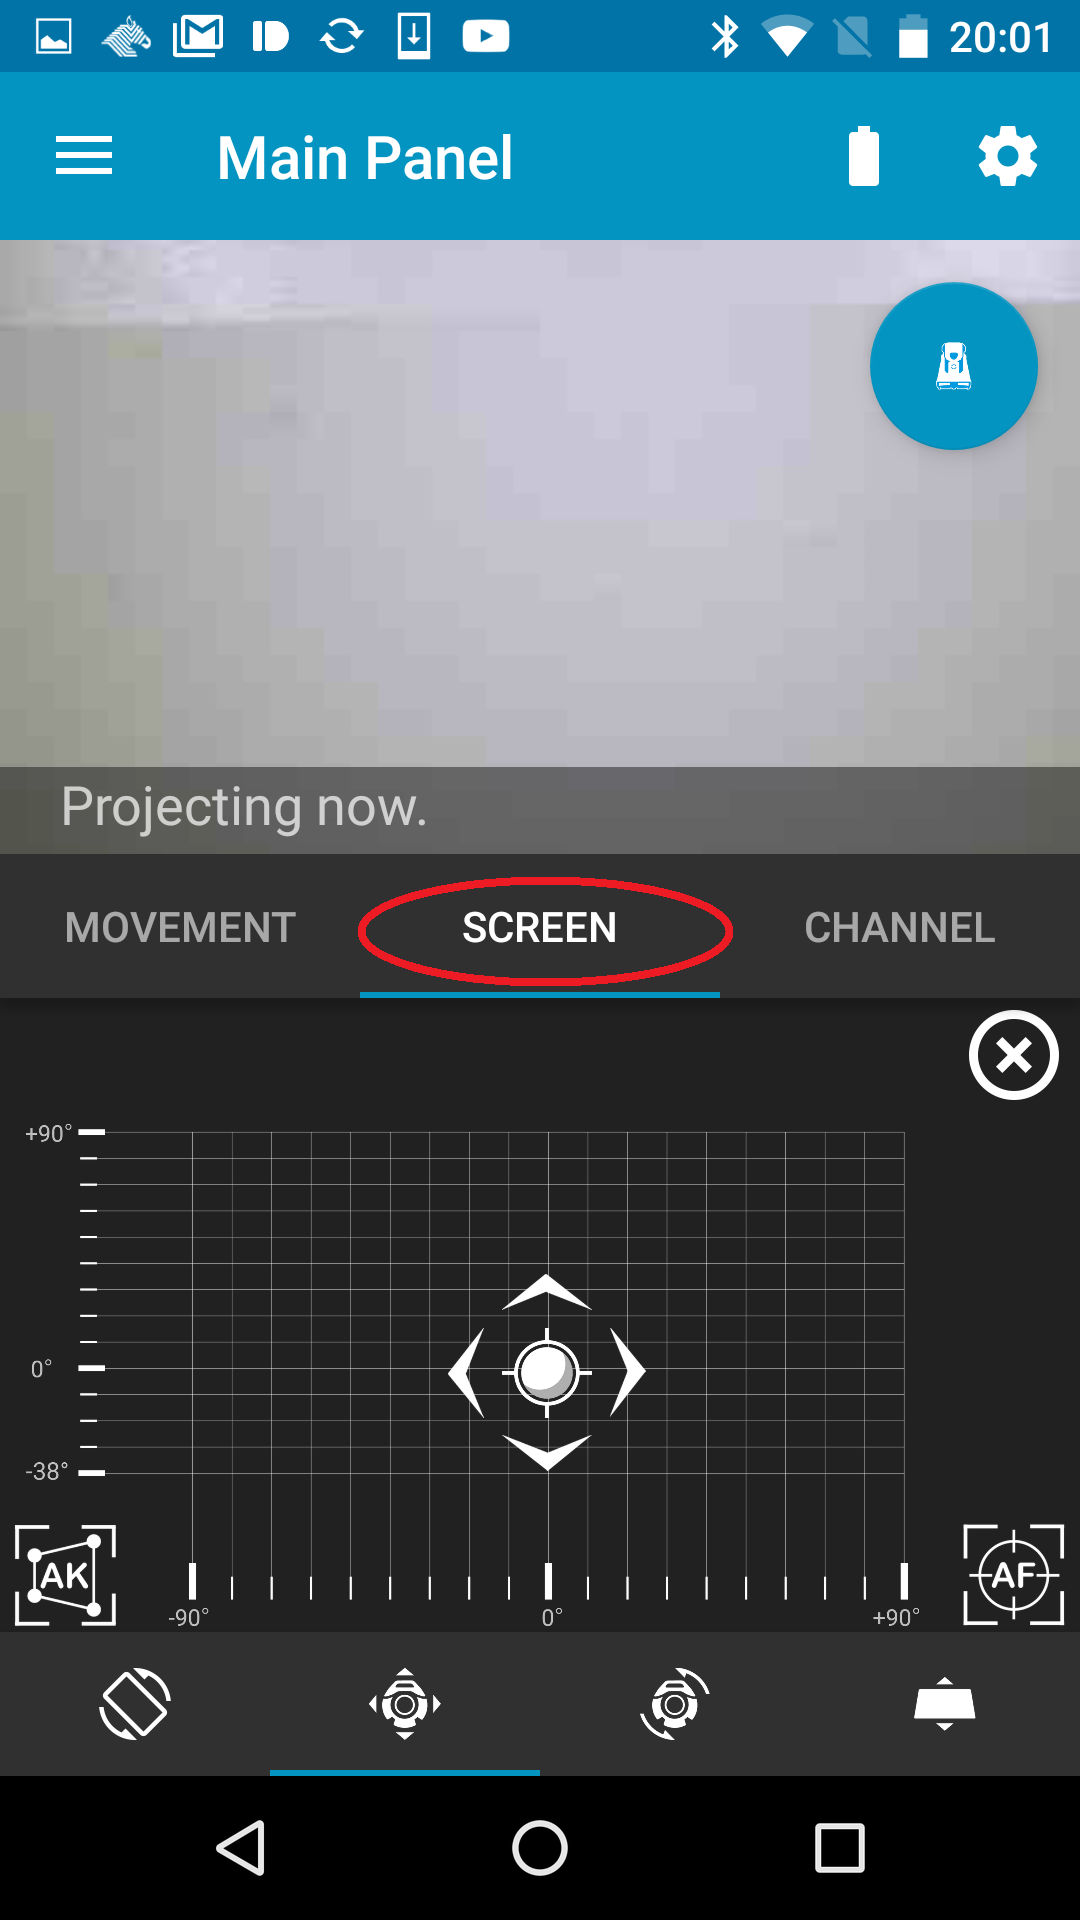
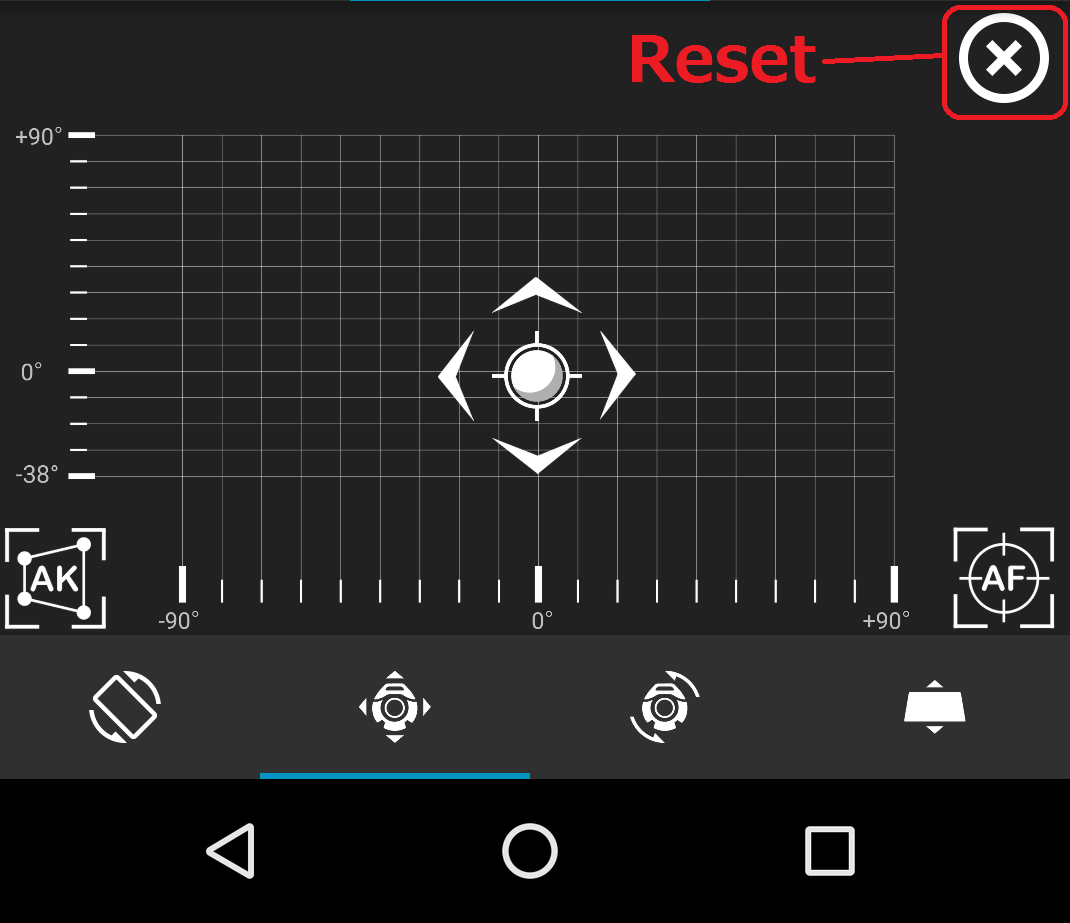
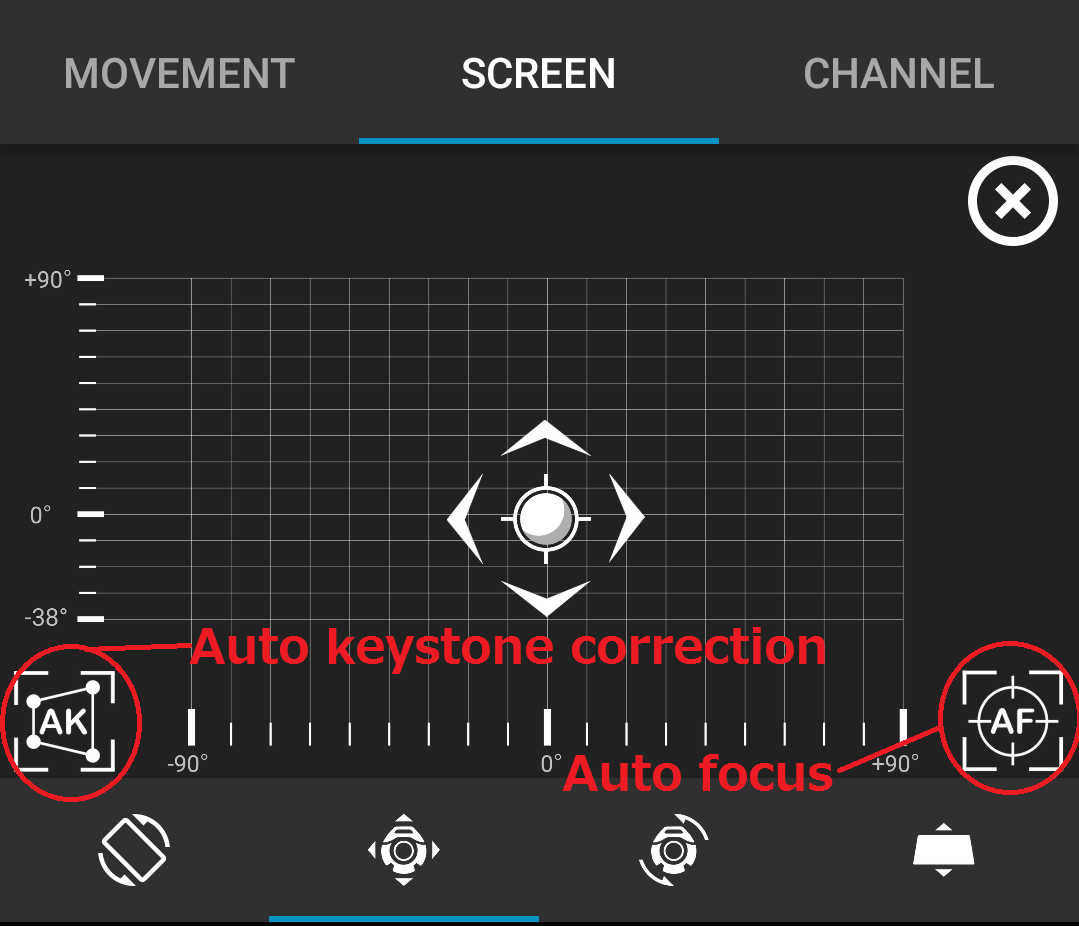
Direction adjustment (Pitch & Yaw)
- Tap the screen tab on the main panel.
- Select Pitch & Yaw tab in the screen tab.
- When you swipe the UI , pitch and yaw direction will change.
Rotation limits are as follows – Upper max. 90 degrees, lower max. 38 degrees. Left to right, -90 to +90 degrees.
*If you want to return to the initial position, tap the reset button.

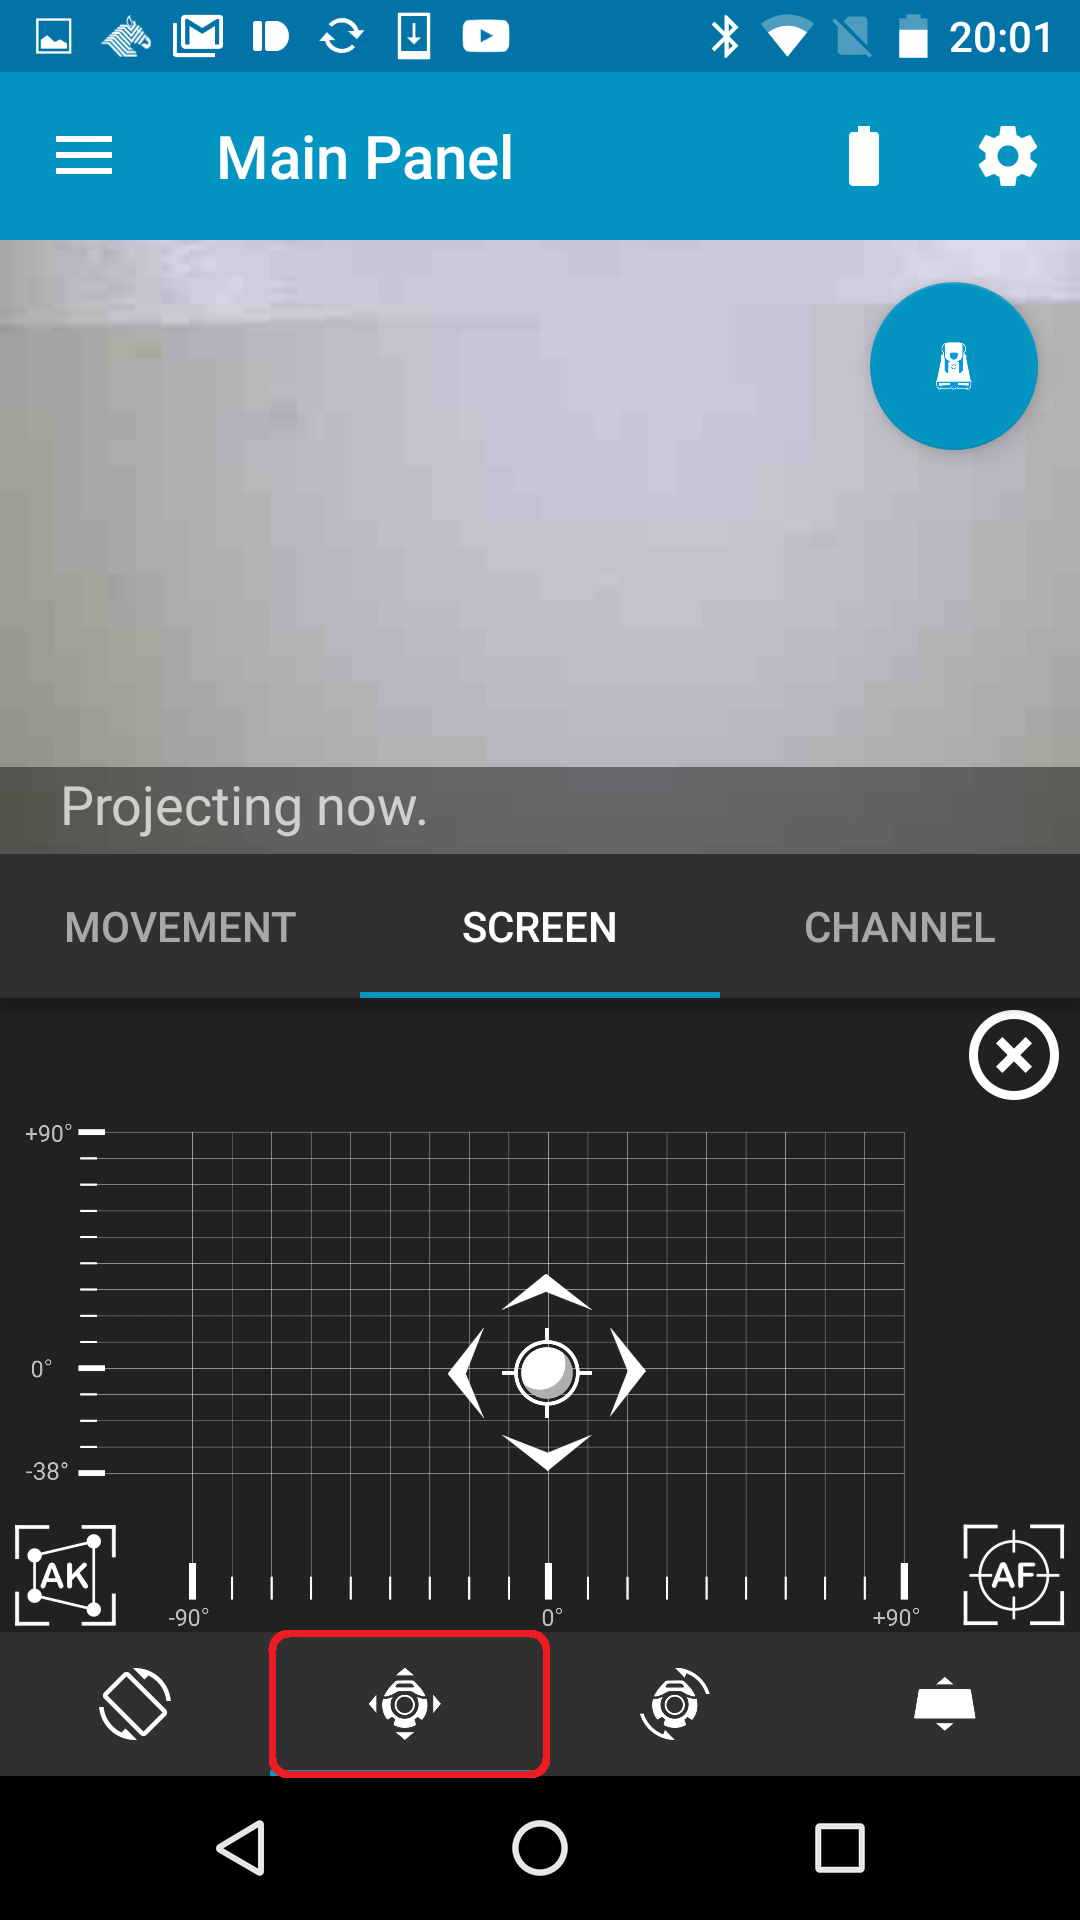
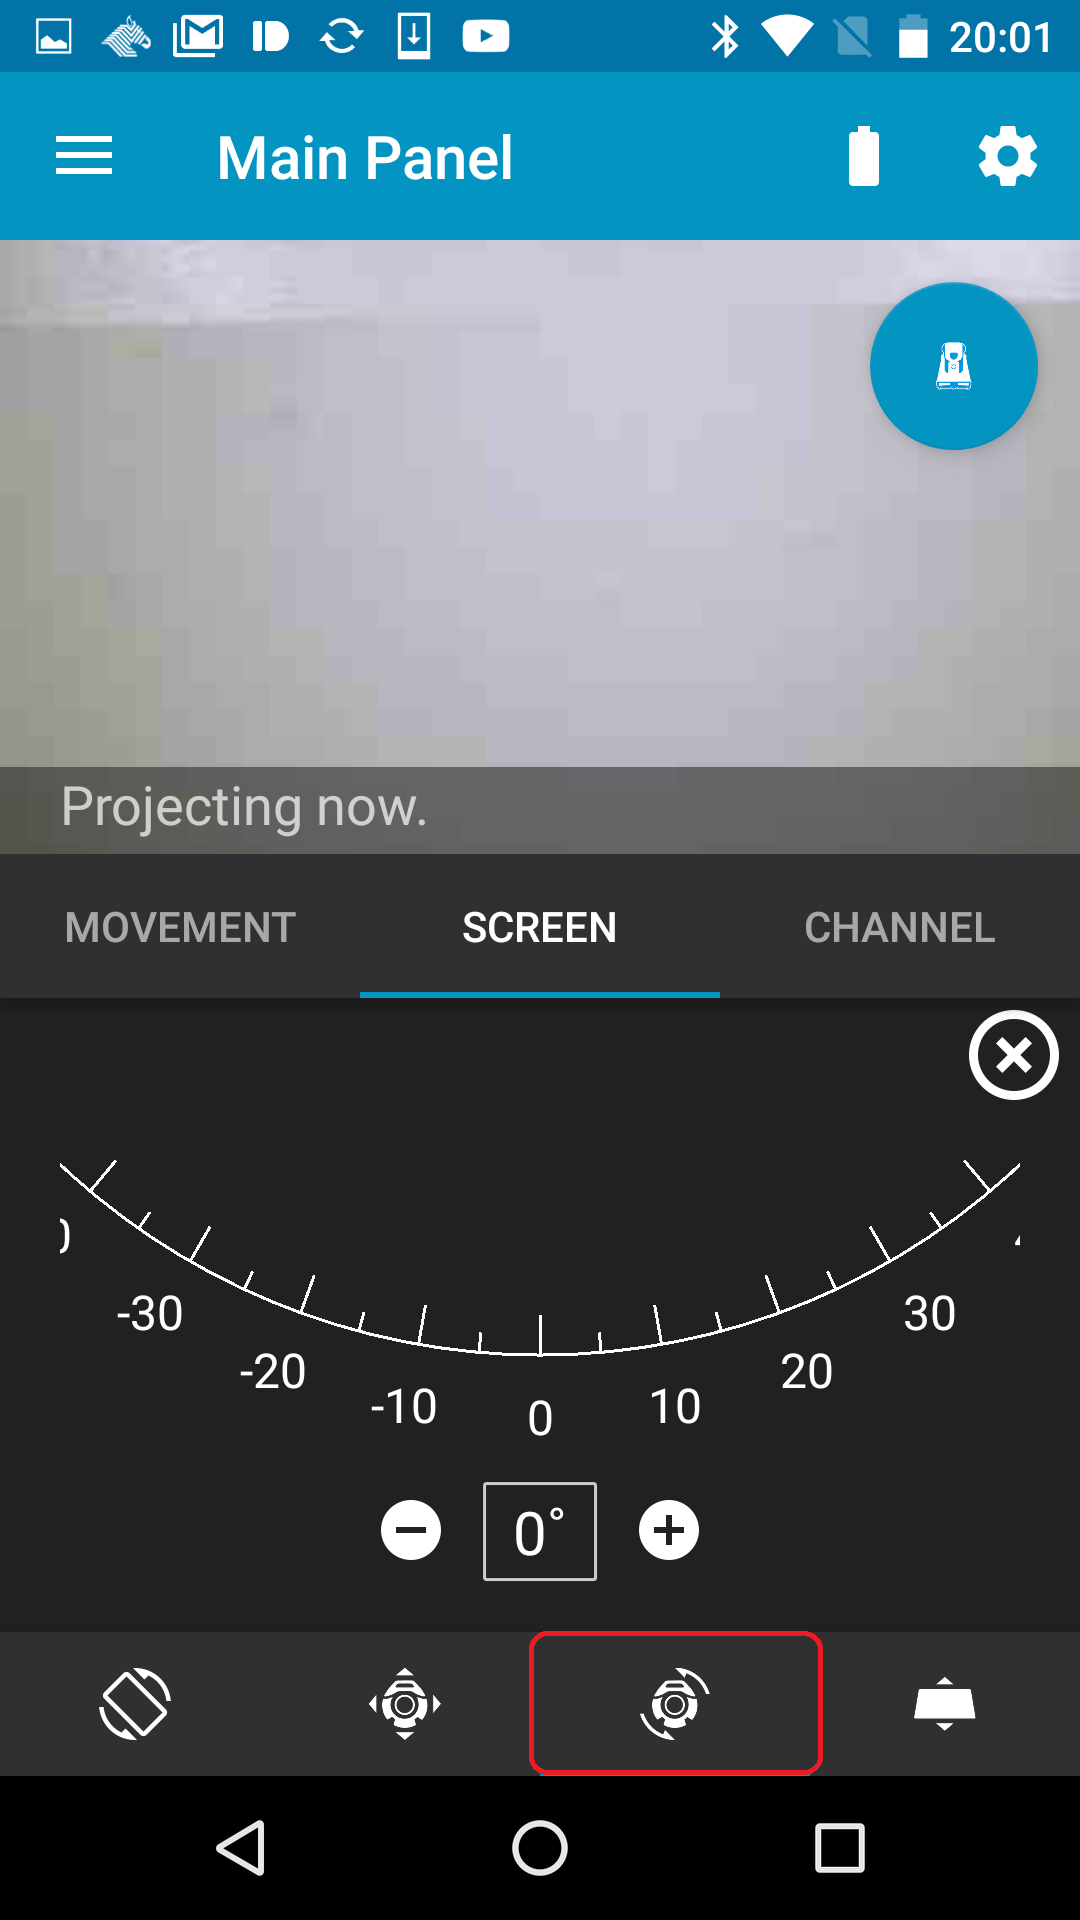
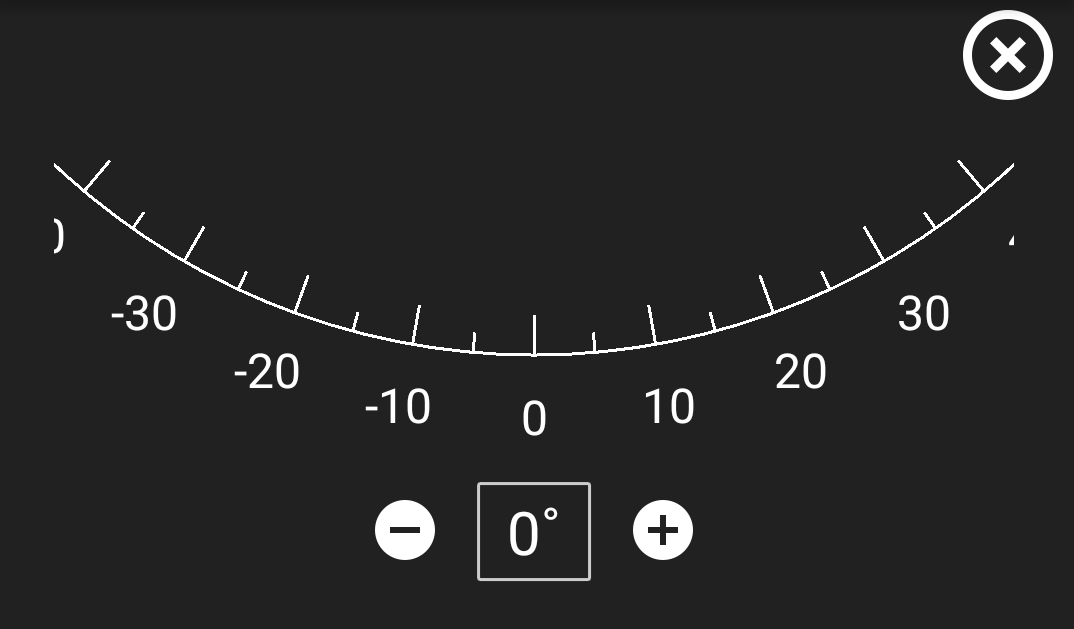
Roll adjustment ( Roll )
Adjust the roll angle for projection.
- Tap the screen tab on the main panel.
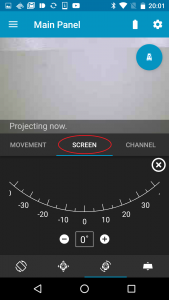
- Tap the roll tab in the screen tab.

- Swipe the UI to adjust roll angle. You can also change the angle by tapping the “+” or “-” buttons.


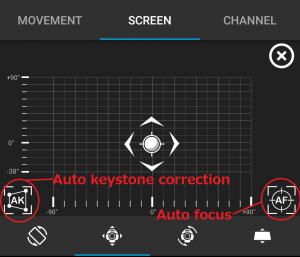
Automatic keystone correction and Auto focus
- Tap the screen tab on the main panel.
- Select Pitch & Yaw tab in the screen tab.
- Auto keystone correction or Auto focus will be completed after tapping each buttons.
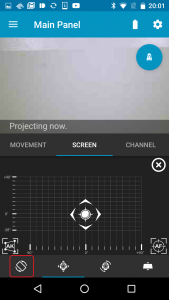
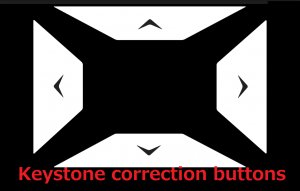
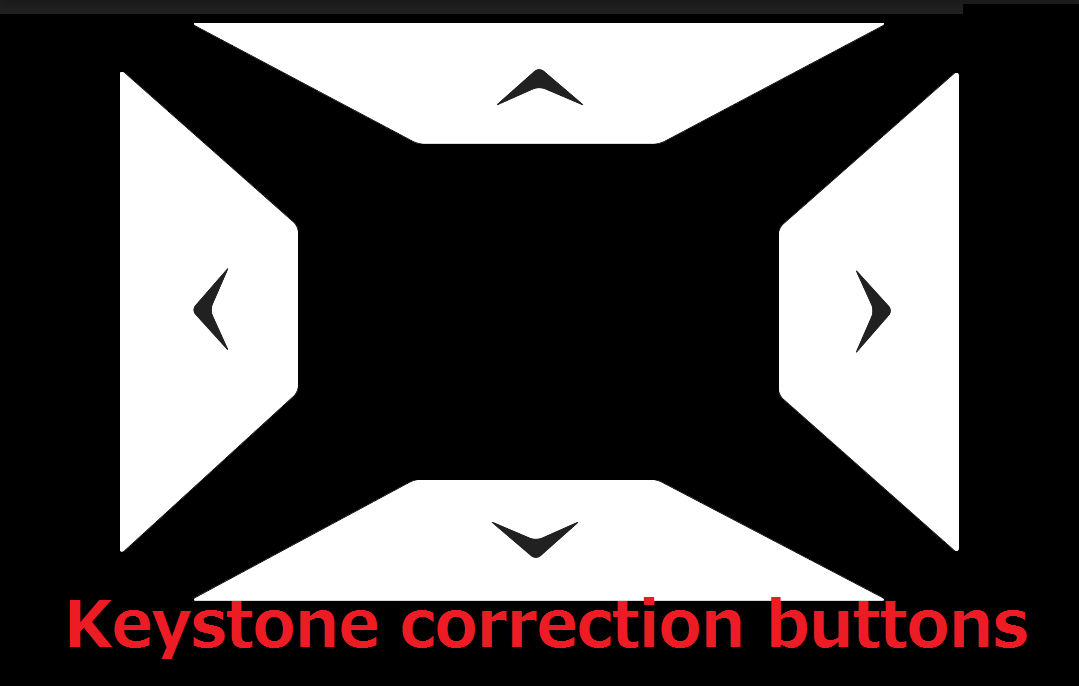
Manual keystone correction
Depending on the position or angle of the projection, there may be cases where the projection screen is distorted. In these cases, it is possible to adjust the shape of the video with manual or automatic keystone correction.
- Tap the screen tab on the main panel.
- Tap the keystone correnction tab.
- Use the controls to adjust the screen.


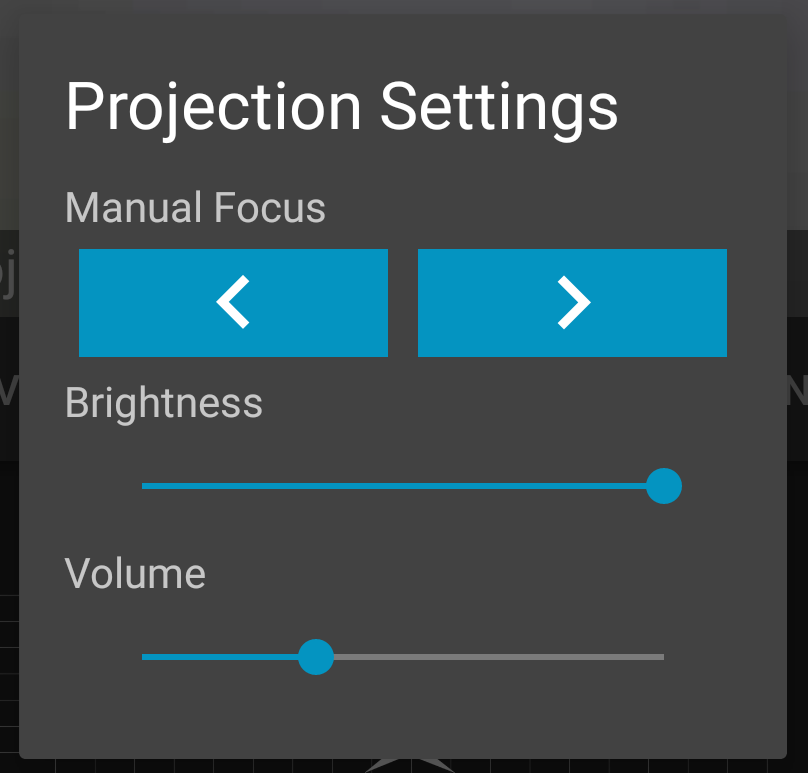
Projection Settings (Manual Focus / Brightness / Volume)
Manual focus, brightness and volume are all adjustable during projection.
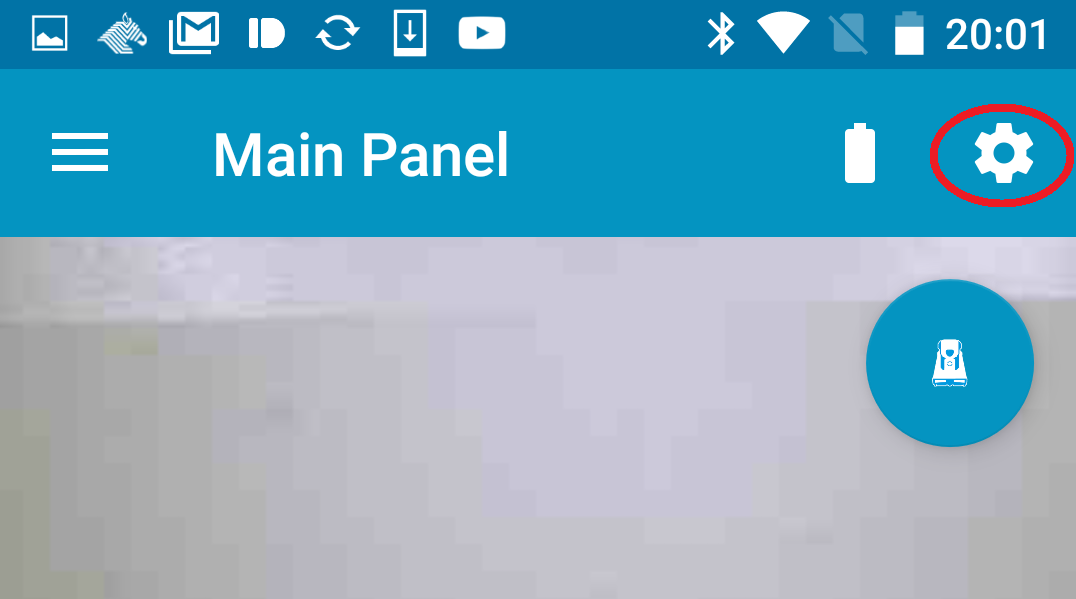
- Press the settings icon on the main panel.
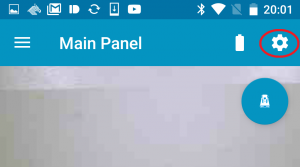
- The Projection Settings will be displayed

- Adjust the manual focus, brightness, volume.
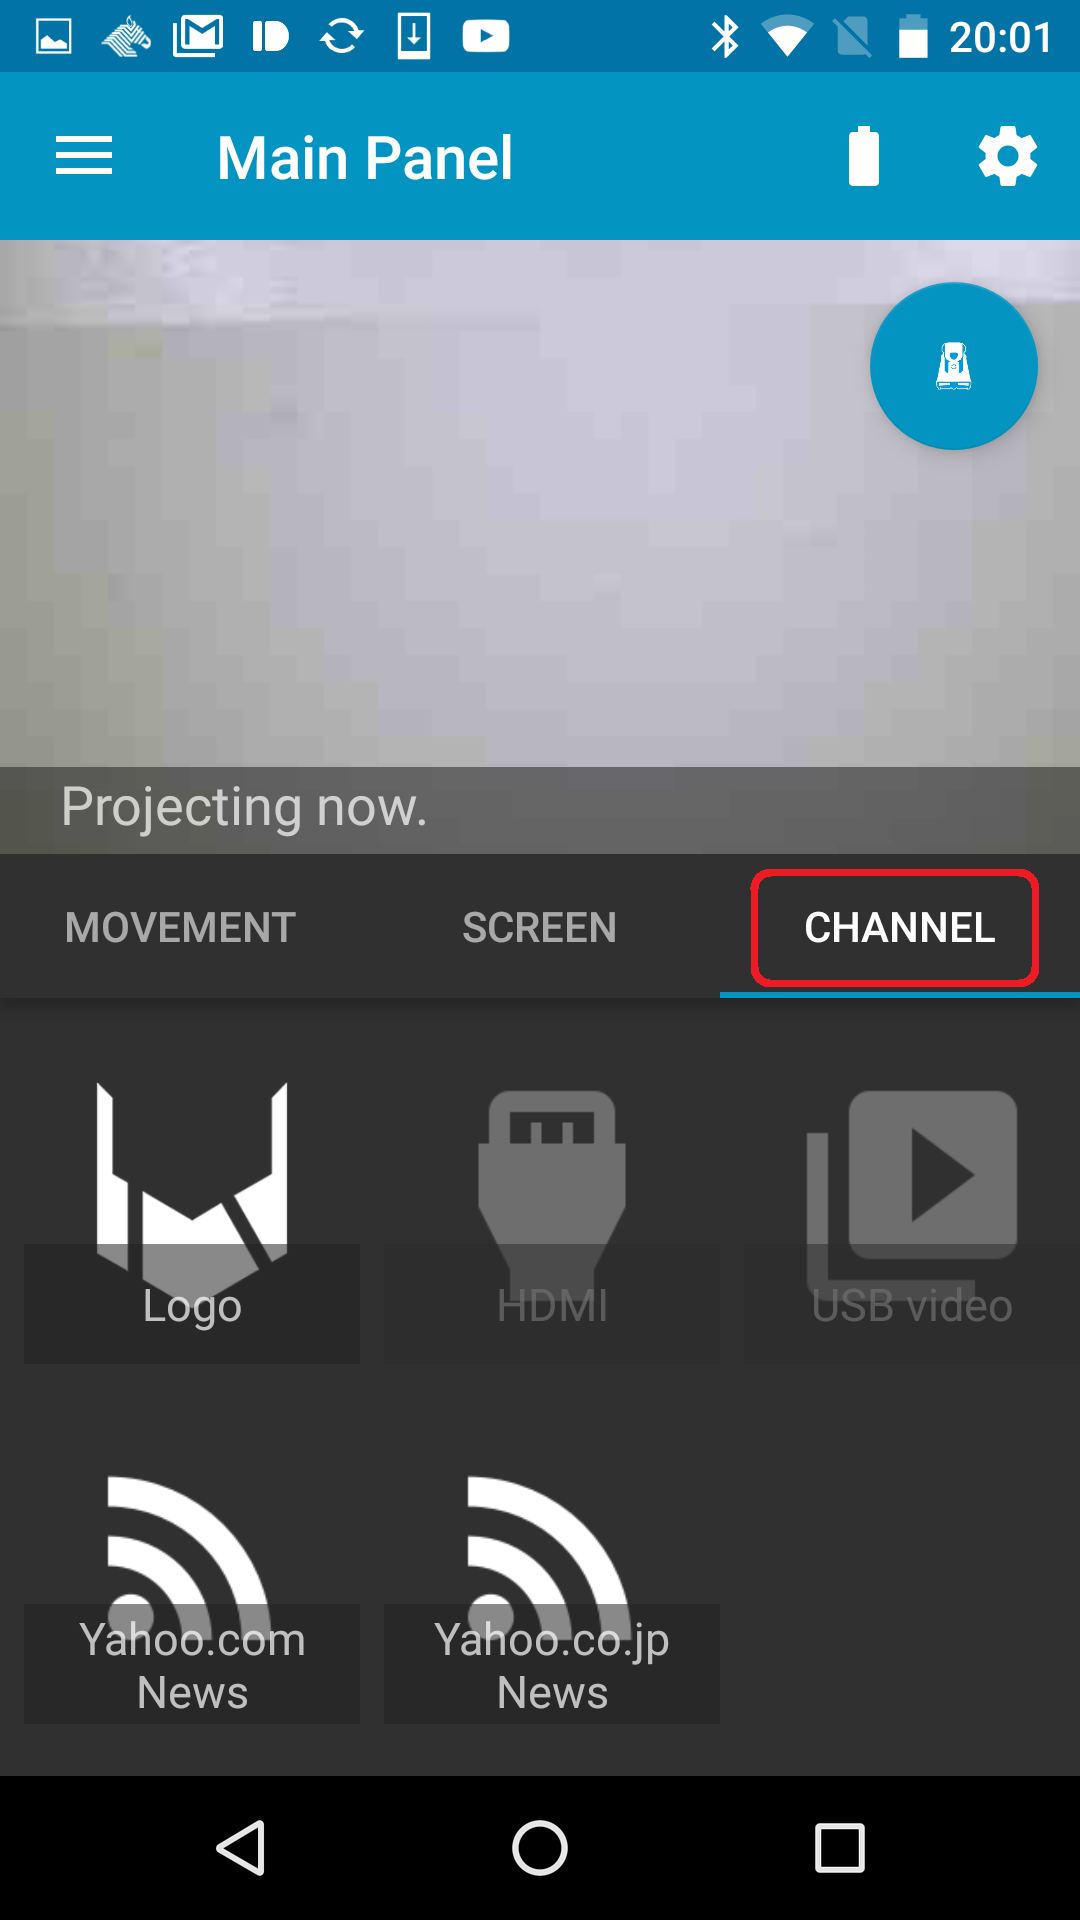
Channel selection
A channel is used for projection content.
The Cerevo logo, HDMI input and USB Video are preset channels.
YouTube and RSS reader channels need to be registered.
Please refer to this link for how to register a new channel.
Channels registered in advance are displayed by tapping the “Channel” tab on the main panel. Tap the channel to select it.
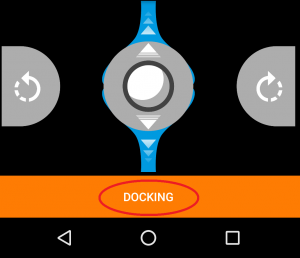
Docking at the charging station
To finish using Tipron or to charge the battery, Tipron should be docked at the charging station.
- Move close to the charging station using manual mode.
- When Tipron is within 1m of the charging station, press the “DOCKING” button.
- Tipron will start docking with the charging station automatically.
*If Tipron cannot find the charging station, docking will be cancelled. Please confirm the charging station is powered and is placed correctly. - When docking is completed, charging starts. The system lights will turn off when charging is complete.
